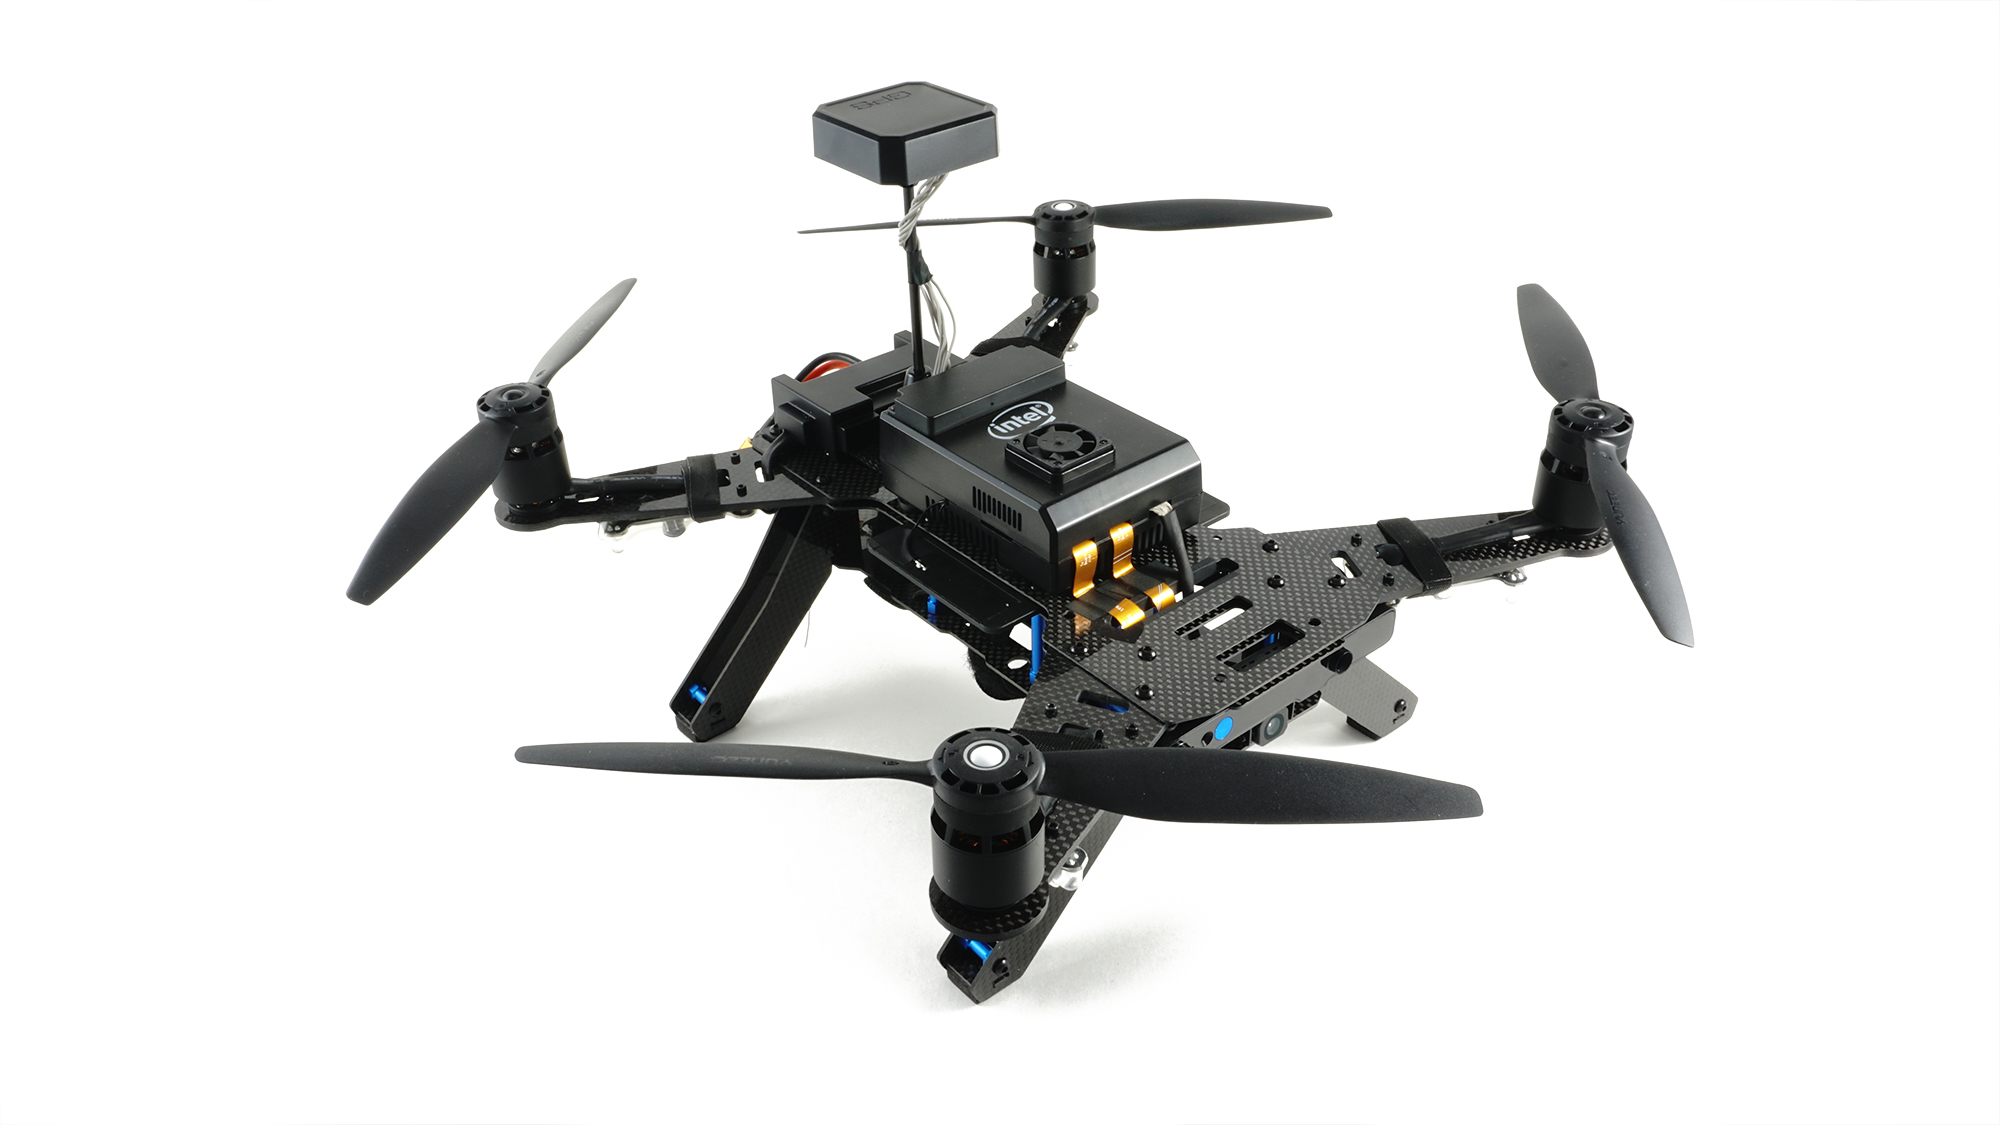
Intel® Aero Ready to Fly Drone
The Intel® Aero Ready to Fly Drone is a UAV development platform. Part of this is the Intel Aero Compute Board, running Linux on a Quad-core CPU. The other part is an STM32 microcontroller that is connected to it and that runs PX4 on NuttX. These are integrated in the same package on the Intel® Aero Ready to Fly Drone, which also includes the vision accessory kit.
Introduction
The main documentation on the official wiki explains how to setup, update and connect to the board, and how to do development on the Linux side. The instructions in this topic concentrate on updating the firmware on the microcontroller from a development tree.
It's important to update to the latest image available since some instructions change between releases. You can check the BIOS and distro version by connecting to the board and running the following command:
get_aero_version.py
The instructions here are tested with the following version:
BIOS_VERSION = Aero-01.00.13
OS_VERSION = Poky Aero (Intel Aero Linux Distro) 1.5.1-dev (pyro)"
AIRMAP_VERSION = 1.8
FPGA_VERSION = 0xc1
Flashing
After setting up the PX4 development environment, follow these steps update the PX4 software:
- Do a full update of all software on the vehicle (https://github.com/intel-aero/meta-intel-aero/wiki/Upgrade-To-Latest-Software-Release)
- Grab the Firmware
- Compile with
make aerofc-v1_default Configure the target hostname
If your system resolves link local names you don't have to do anything and you can skip this step. You can test it by trying to ssh into
intel-aero.localafter connecting to it either via WiFi or USB:ssh root@intel-aero.localIf it doesn't work you can try giving the IP that will be used by the upload script:
# WiFi IP
export AERO_HOSTNAME=192.168.8.1

# Ethernet-over-USB IP
export AERO_HOSTNAME=192.168.7.2
Upload with
make aerofc-v1_default upload
Connecting QGroundControl via Network
- Make sure you are connected to the board with WiFi or USB Network
- ssh to the board and make sure MAVLink forwarding runs. By default it automatically starts when booting. It can be started manually with:
systemctl start mavlink-router - Start QGroundControl and it should automatically connect.
- Instead of starting QGroundControl, you can open a NuttX shell with:
./Tools/mavlink_shell.py 0.0.0.0:14550
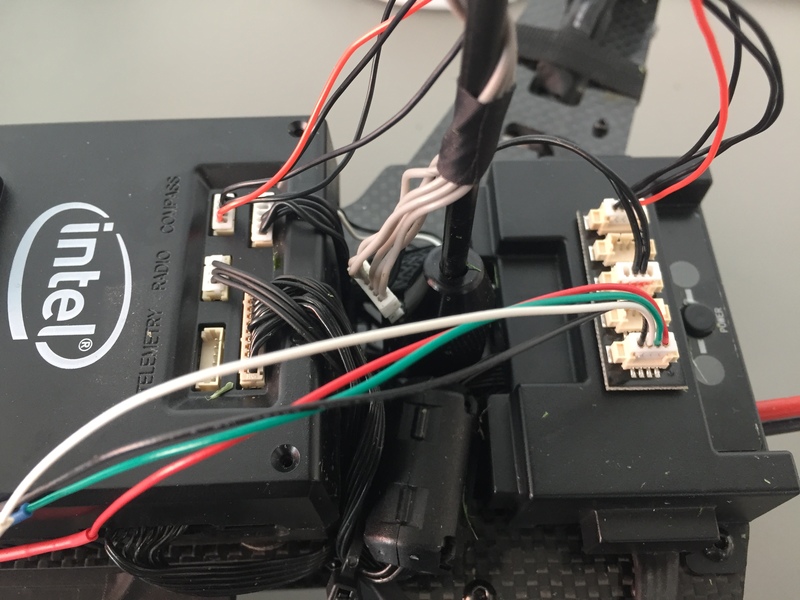
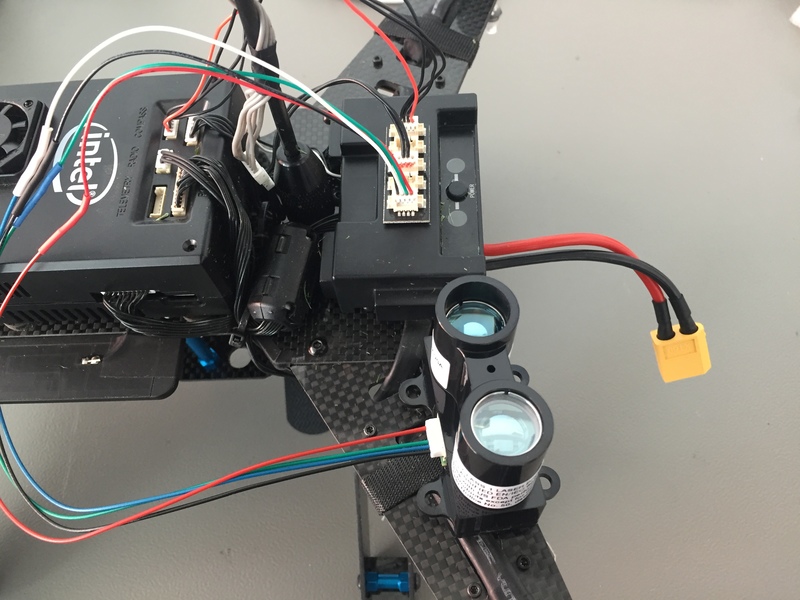
Connecting a Lidar Lite Range Finder
The following instructions are for a Lidar Lite V3 connected via I2C. The Intel® Aero Ready to Fly Drone has two ports with I2C: One labled COMPASS and the other TELEMETRY. The pinout for both of them can be found below. We recommend using the TELEMETRY port as it is not being used. If your TELEMETRY port is already occupied, a splitter can be used to share the I2C connection (works on any I2C port). Check the images below for the splitter setup. In addition it is recommended to use a electrolytic capacitor for the Lidar Lite I2C connection to reduce spikes in the distance readings (see here on page 3).
The pinout for the Lidar Lite V3 is as follows
| pin | Aerofc TELEMETRY | Lidar Lite V3 |
|---|---|---|
| 1 | VCC | VCC |
| 2 | TX | - |
| 3 | RX | - |
| 4 | SCL | SCL |
| 5 | SDA | SDA |
| 6 | GND | GND |
| pin | Aerofc COMPASS | Lidar Lite V3 |
|---|---|---|
| 1 | VCC | VCC |
| 2 | SCL | - |
| 3 | SDA | - |
| 4 | GND | SCL |
| 5 | - | SDA |
| 6 | - | GND |
Using Optical Flow on the Aero
The Intel® Aero Ready to Fly Drone comes with a preinstalled optical flow binary on the compute board (Linux OS version 1.6 or higher), which enables it to stably fly based on optical flow velocity estimation. In order to use optical flow, a range sensor has to be installed first (see above).
To use the optical flow, run the following command in a console on the vehicle's compute board:
systemctl start aero-optical-flow
If you want to start the optical flow binary at boot, use
systemctl enable aero-optical-flow #use disable to undo
In addition, the following parameter values should be set in the flight controller.
| Parameter | Value |
|---|---|
| EKF2_AID_MASK | 2 |
| EKF2_HGT_MODE | 2 |