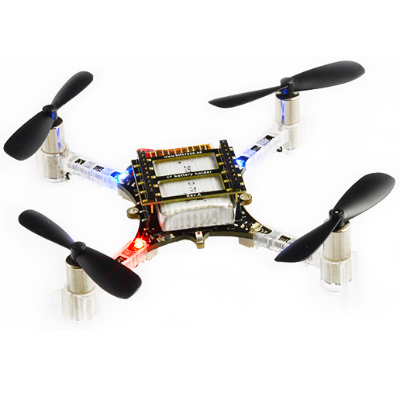
Crazyflie 2.0
The Crazyflie line of micro quads was created by Bitcraze AB. An overview of the Crazyflie 2 (CF2) is here: https://www.bitcraze.io/crazyflie-2/
Quick Summary
The main hardware documentation is here: https://wiki.bitcraze.io/projects:crazyflie2:index
- Main System-on-Chip: STM32F405RG
- CPU: 168 MHz ARM Cortex M4 with single-precision FPU
- RAM: 192 KB SRAM
- nRF51822 radio and power management MCU
- MPU9250 Accel / Gyro / Mag
- LPS25H barometer
Flashing
After setting up the PX4 development environment, follow these steps to put the PX4 software on the CF2:
- Grab source code of the PX4 Bootloader
- Compile using
make crazyflie_bl - Put the CrazyFly 2 (CF2) into DFU mode by following these steps:
- Ensure it is initially unpowered
- Hold down button
- Plug into computer's USB port
- After a second, the blue LED should start blinking and after 5 seconds should start blinking faster
- Release button
- Flash bootloader using dfu-util:
sudo dfu-util -d 0483:df11 -a 0 -s 0x08000000 -D crazyflie_bl.binand unplug CF2 when done- If successful, then the yellow LED should blink when plugging in again
- Grab the Firmware
- Compile with
make crazyflie_default upload - When prompted to plug in device, plug in CF2: the yellow LED should start blinking indicating bootloader mode. Then the red LED should turn on indicating that the flashing process has started.
- Wait for completion
- Done! Calibrate via QGC
If QGC does not connect with the vehicle, ensure that in nuttx-config for crazyflie
# CONFIG_DEV_LOWCONSOLE is not setis replaced byCONFIG_DEV_LOWCONSOLE=y
Wireless
The onboard nRF module allows connecting to the board via Bluetooth or through the proprietary 2.4GHz Nordic ESB protocol.
- A Crazyradio PA is recommended.
- To fly the CF2 right away, the Crazyflie phone app is supported via Bluetooth
Using the official Bitcraze Crazyflie phone app
- Connect via Bluetooth
- Change mode in settings to 1 or 2
- Calibrate via QGC
Connecting via MAVLink
- Use a Crazyradio PA alongside a compatible GCS
- See cfbridge for how to connect any UDP capable GCS to the radio. Before using the
make runcommand of cfbridge, make sure you have set the udev permissions to use the USB Radio. To do this, follow the steps listed here and restart your computer. Then go to the cfbridge folder and runmake run.