OctoMap
The OctoMap library implements a 3D occupancy grid mapping approach. This guide covers the how to use it with Rotors Simulator.
Installation
The installation requires to install ROS, Gazebo and the Rotors Simulator plugin. Follow the instructions on Rotors Simulator to install.
Next, install The OctoMap library
    sudo apt-get install ros-indigo-octomap ros-indigo-octomap-mapping
    rosdep install octomap_mapping
    rosmake octomap_mapping
Now, open ~/catkin_ws/src/rotors_simulator/rotors_gazebo/CMakeLists.txt and add the following lines to the bottom of the file
    find_package(octomap REQUIRED)
    include_directories(${OCTOMAP_INCLUDE_DIRS})
    link_libraries(${OCTOMAP_LIBRARIES})
Open ~/catkin_ws/src/rotors_simulator/rotors_gazebo/package.xml and add the following lines
    <build_depend>octomap</build_depend>
    <run_depend>octomap</run_depend>
Run the following two lines.
    export EDITOR='gedit'
    rosed octomap_server octomap_tracking_server.launch
and change the two following lines
    <param name="frame_id" type="string" value="map" />
    ...
    <!--remap from="cloud_in" to="/rgbdslam/batch_clouds" /-->
    <param name="frame_id" type="string" value="world" />
    ...
    <remap from="cloud_in" to="/firefly/vi_sensor/camera_depth/depth/points" />
Running the Simulation
Now run the three following lines, in three separate terminal windows. This opens up Gazebo, Rviz and an octomap server.
    roslaunch rotors_gazebo mav_hovering_example_with_vi_sensor.launch  mav_name:=firefly
    rviz
    roslaunch octomap_server octomap_tracking_server.launch
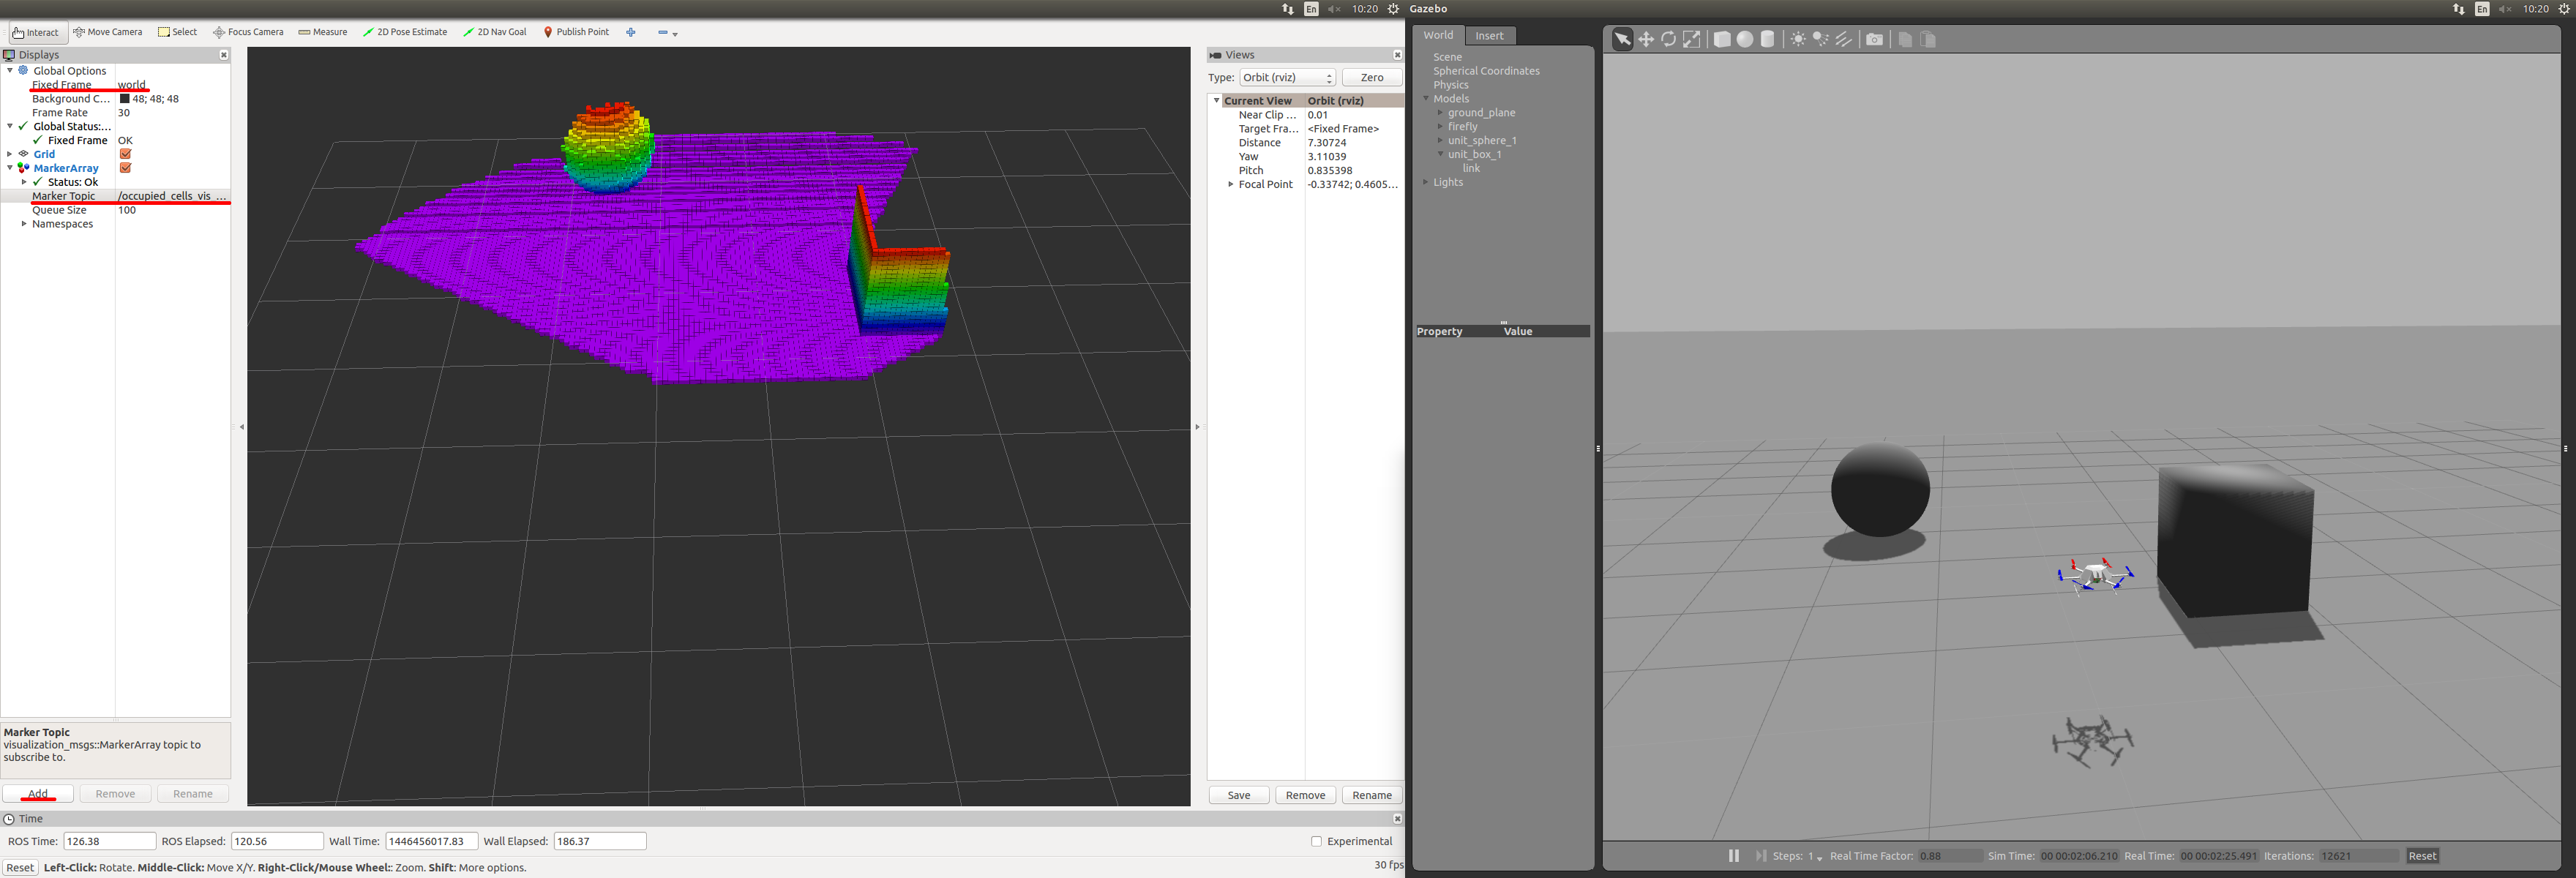
In Rviz, change the field 'Fixed Frame' from 'map' to 'world' in the top left of the window. Now click the add button in the bottom left and select MarkerArray. Then double click the MarkerArray and change 'Marker Topic' from '/free_cells_vis_array' to '/occupied_cells_vis_array'
Now you should see a part of the floor.
In the Gazebo window, insert a cube in front of the red rotors and you should see it in Rviz.
